If you accept payment through PayPal for your goods and services, you may want to create a shipping label straight through the same platform. Since the summer of 2021, PayPal replaced their shipping with ShipStation, which can be confusing for some people. So we will walk through step-by-step how to create a shipping label with the new PayPal ShipStation integration.
How To Create Shipping Label With PayPal ShipStation (Step-by-Step)
Step 1
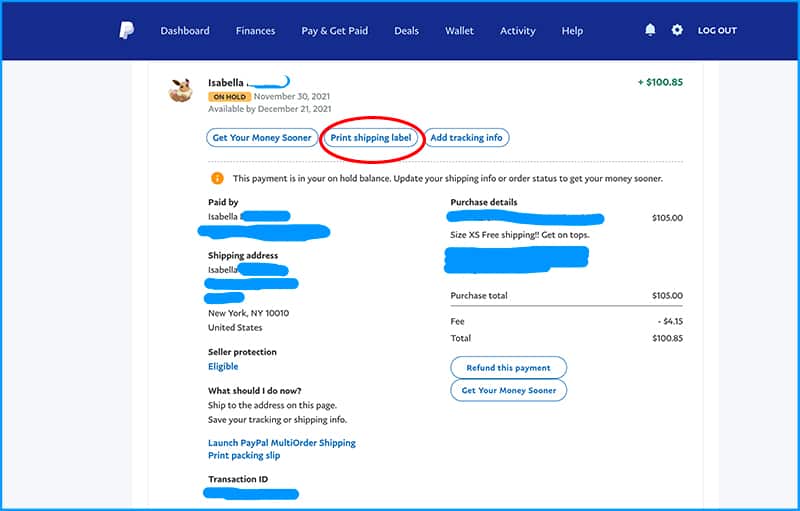
Once you log on to your account, you will see all your transactions. Go ahead and click on the transaction that you will be buying a shipping label for. Then find “Print shipping label”
Step 2
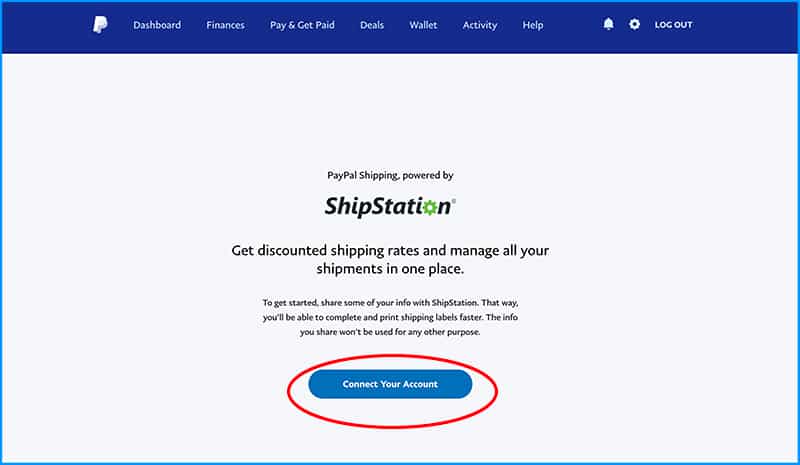
If this is your first time buying a shipping label through PayPal’s new integration, you will see this page below asking you to connect your account to ShipStation.
Step 3
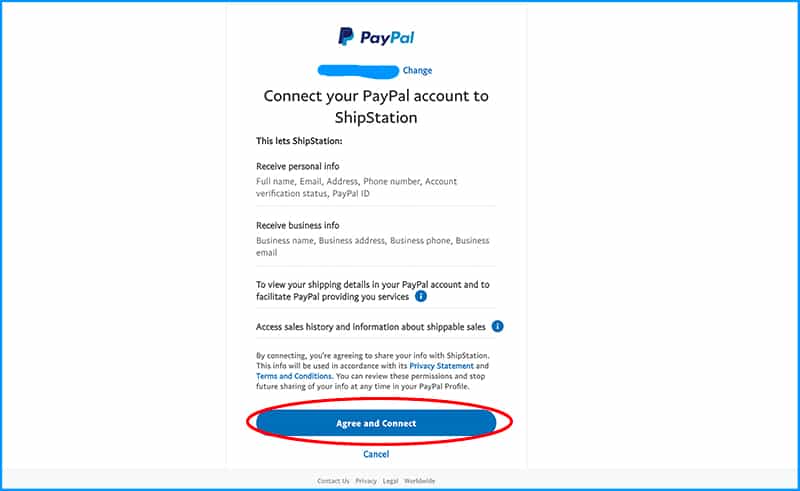
When you select to connect your account, it will bring you to a page that will give you the terms and conditions.
Step 4
You will then be able to select your shipping label layout. If you’re using a regular printer like a laser printer or an inkjet printer, you can stick with the default setting of 8.5×11 inch paper. It is automatically formatted to print half sheet so it is ready to be used with the half sheet shipping labels.
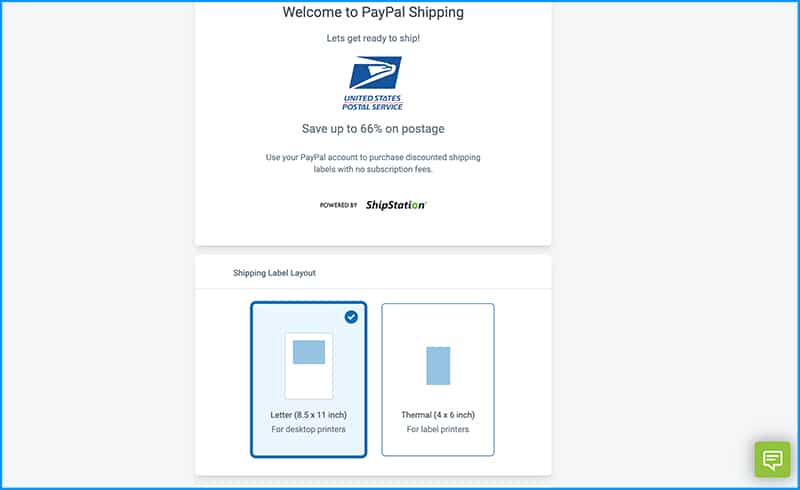
We use this thermal printer for all our shipping labels so we will select the “Thermal (4 x 6 inch)”.
Step 5
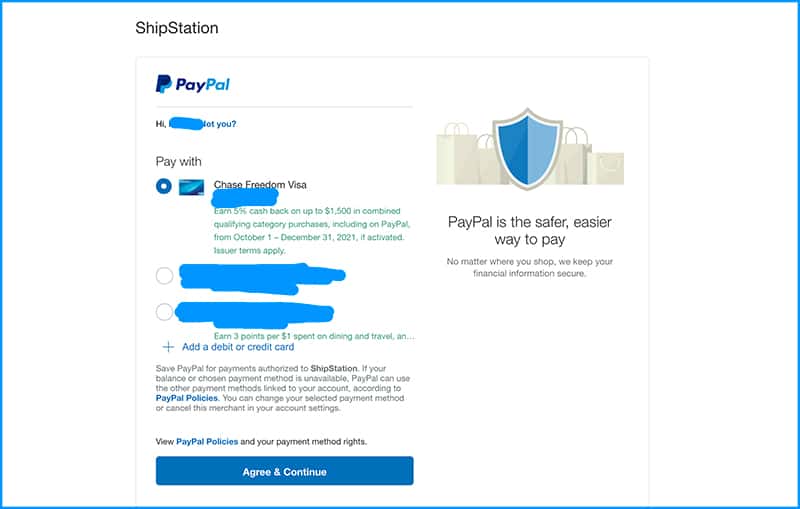
Next, you will be asked how you will pay for the shipping label. You can select any PayPal-linked card or bank account to continue.
Step 6
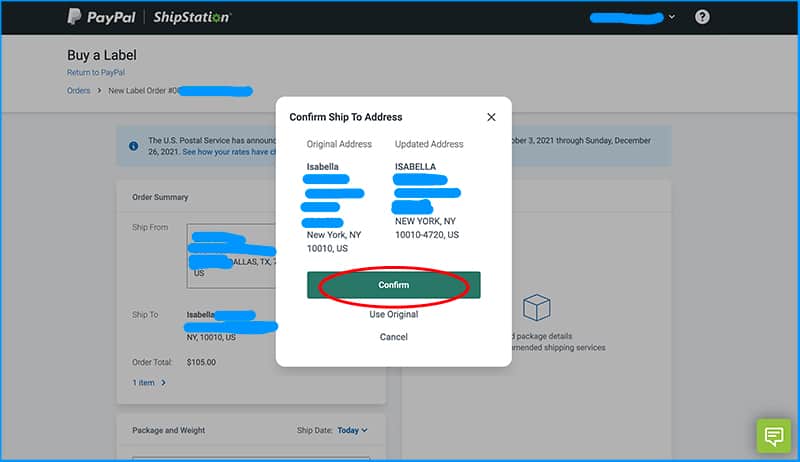
ShipStation will confirm the ship-to address. This is a good thing to avoid any entry error such as spelling or missing numbers from your customer.
Step 7
ShipStation does have prompts throughout the create a shipping label process. It is best to select a “Custom Package” and enter all your package information so that you can see the cheapest shipping rate.
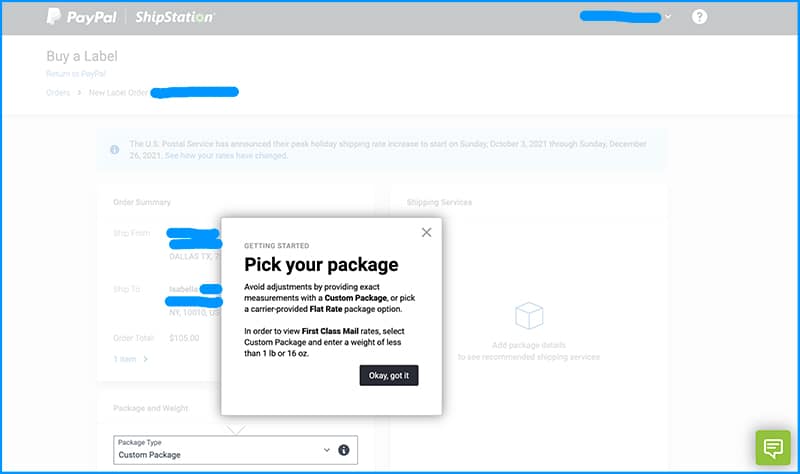
Step 8
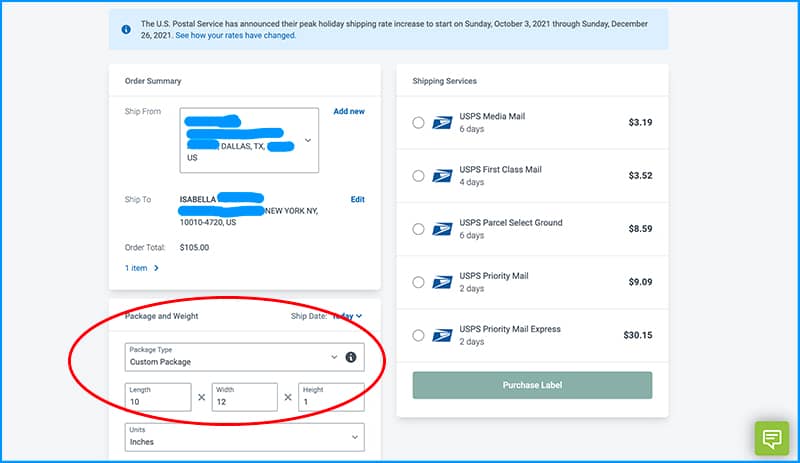
As with shipping any packages from home, make sure you have a shipping scale and a measuring tape. Then enter the weight and dimensions. Do round up the weight to the closest ounce. For example, our package was 3.4 ounces but we rounded up to 4 ounces to account for the shipping label that will be printed.
Step 9
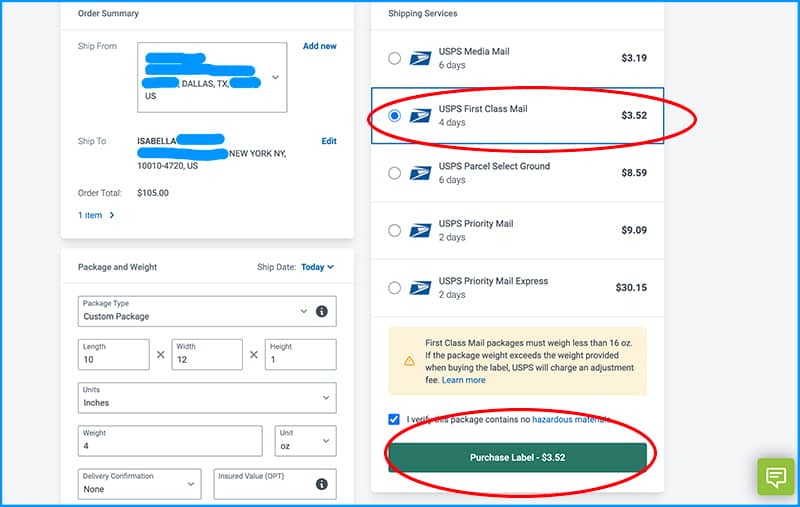
You will see all your shipping options that are not Priority Flat Rate prices. Since the software does not know the contents of your package, they do include USPS Media Mail prices. Unless your package falls strictly under Media Mail, select the next cheapest option. In our case, it is USPS First Class Mail. Then go ahead and purchase your label.
Read Also: USPS Media Mail Rules Explained
Step 10
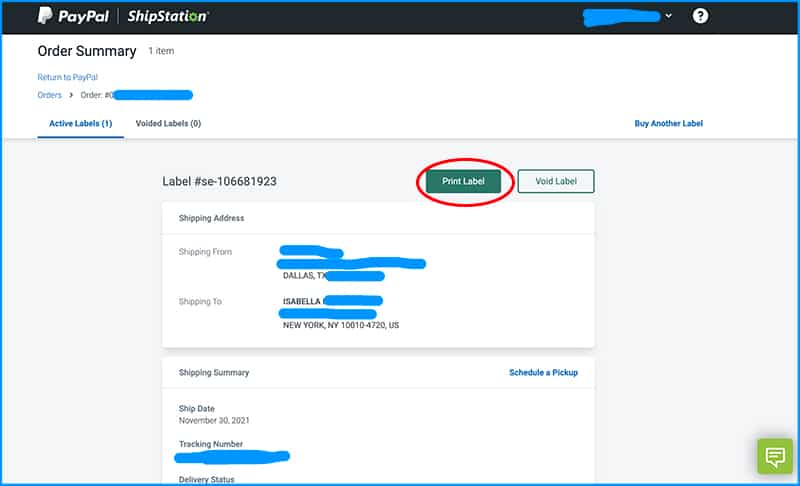
You will see a summary page of all your labels on the next page. Here, you will be able to print your label.
Step 11
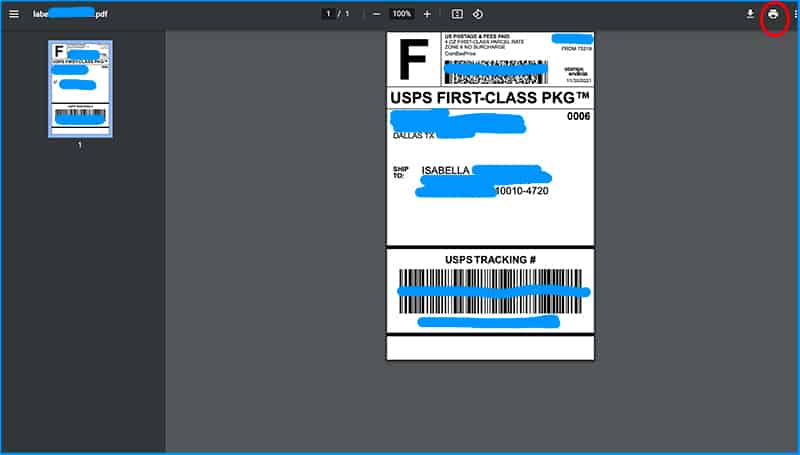
It will bring your label with your chosen format in a new window for printing. We had picked the Thermal printer setting so ours is already formatted to be printed on a 4×6 inch label. Look for a printer icon to print.
ShipStation Vs Pirate Ship
So how does Shipstation compare with Pirate ship for shipping? Is ShipStation or Pirate ship cheaper for shipping labels?
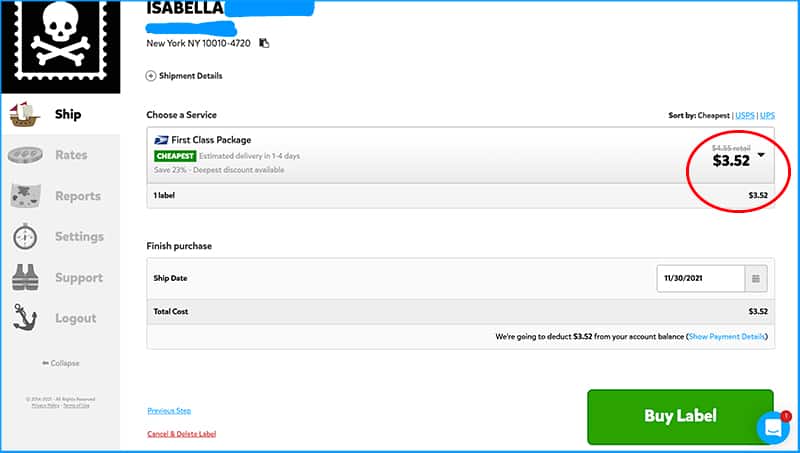
The cost to ship the same First Class package is actually the same. You will get commercial rates on USPS postage with both ShipStation and Pirate ship. However, Pirate ship offers $100 built-in insurance for USPS Priority Mail and Priority Mail Express.
For First Class Mail and Parcel Post, there is no built-in insurance. That is whether you buy it from ShipStation, Pirate ship, any other shipping software, or directly from USPS.com.
Last Thoughts
Now that PayPal has integrated with ShipStation, is it better than Pirate Ship? That depends on how often you use PayPal. If you’re only occasionally using PayPal, it may be easier to stick with the same platform and create a shipping label with PayPal and ShipStation.
However, Pirate Ship is easier to navigate for orders not connected to PayPal. That includes sales from eBay, Amazon, and Mercari.
Read Next: Paypal Versus Pirate Ship: Which Is Better For Shipping Labels?
