

If you are looking to streamline your home business and optimize your amazon FBA workflow with amazon product FBA FNSKU labels, you have come to the right place! While you can set up and print Amazon FBA FNSKU labels with a regular printer and paper, this method will eliminate the use of tape and scissors, saving you time and hassle.
With a thermal printer, the SKUs will not smudge or fade as easily as a toner and ink-type printer. This will keep your inventory safer under handling and packing at the Amazon warehouse. It does not matter if you are using a Rollo, Dymo 4XL, any Zebra models, or a Brother QL-1100NWB or third-party thermal printer.
The only thing you will need to keep in mind is that you are using the correct type of labels. If you are using the Brother, you will need DK labels due to how the Brother senses labels. To use a Dymo 4XL, you will need the notch-type labels. If you are using the Zebra, Rollo, or other thermal printers that do not use proprietary labels, you can use any labels you have. You can read all about label compatibility here.
If you would like to watch a video version, skip to the end of the post. This particular tutorial is set up with a Mac but it can easily be set on Windows as well. We will use the Rollo thermal printer for this step-by-step tutorial.
What are Amazon FBA FNSKU Labels?
First, what are amazon FNSKU labels anyway? Amazon FNSKUs, short for Fulfilment Network Stock Keeping Unit, is the small barcodes that go on each individual product. This is a logistics tool that Amazon uses to identify and track each product and its sellers.
Why does Amazon need this system? Amazon fulfillment centers may receive the same exact product from many different merchants or sellers. While the product that you are selling already has a manufacturer’s barcode, Amazon needs a different identifying set of code to be able to pay the correct seller.
Your Amazon FNSKU product label will have the barcode, the name along with other identifiers such as size and color, and the condition.
What You Need to Download and Print Amazon FBA FNSKU Labels
In order to get started, you will need a listing on your amazon merchant account. Then, you will need:
- A thermal printer of your choice
- SKU labels compatible to your thermal printer
- Rollo Chrome Extension
- A Rollo account
There are also a couple of things you need to make sure.
- First, make sure your printer is already installed on your computer and is calibrated to the labels that you will be using. If you don’t know how to calibrate your printer, refer to your instruction manual. The labels we are using are 62 mm x 29mm labels made for Brother printers but they will work on the Rollo because the Rollo can use any labels. If you do not already have a label, you can find them here and here.
- Secondly, we will be using the Rollo Chrome Extension. So make sure that you are on Google Chrome to ensure that the labels get cropped correctly. If you need to install this extension, simply go to https://www.rollo.com/chrome-extension/ or google “Rollo chrome extension” and then click on the “Download Rollo Chrome Extension” button.
- Lastly, you will need to have a Rollo account, which is free. So go create an account and then log in. Once you have the chrome extension installed, there will be an extra purple-colored button for “Rollo Labels” next to the “Print labels for this page” on your amazon Merchant SKU page. When you click on it, your SKU labels will be formatted to print from the Rollo thermal printer.
Formatting Amazon Settings
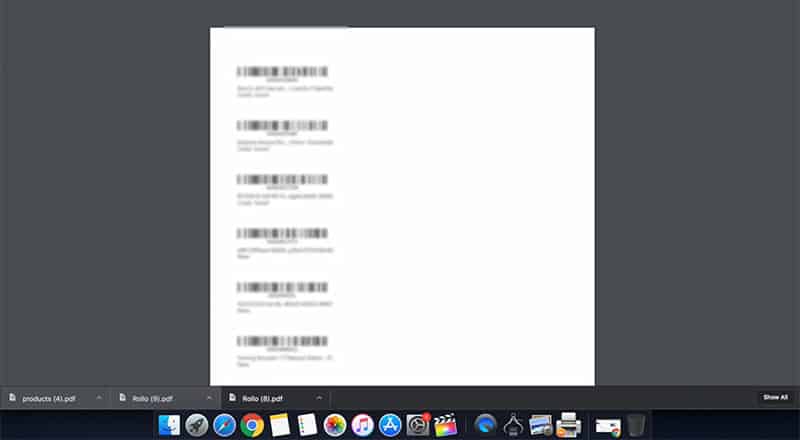
To get started, you will need to format your Amazon settings. On your FBA, the amazon product SKUs on your computer will normally look like this. The PDF is usually formatted to be printed on a regular printer with 8.5” x 11” paper.
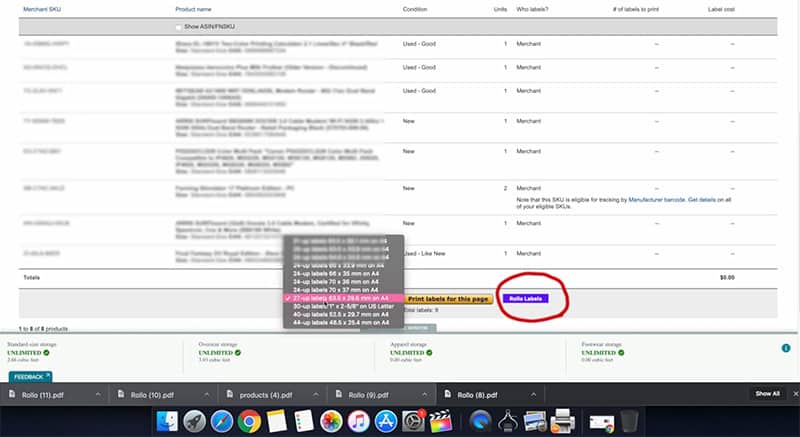
Once you have created your shipment and are ready to print, look for a drop-down on the bottom of the page where you will select the size of the labels. Check the one that says “27 -up labels 63.5 x 29.6 mm on A4”, which is the closest dimensions to the SKU labels we have. Then click on the purple “Rollo Labels”.
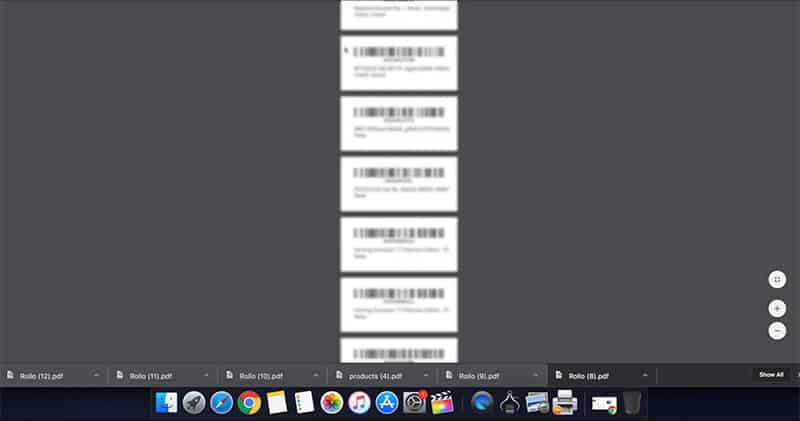
This will bring up a new PDF of your SKUs that is now formatted for each individual FNSKU label, instead of the original in 8.5” x 11” pdf format that you need to cut.
Formatting Your Thermal Printer’s Settings
Step 1
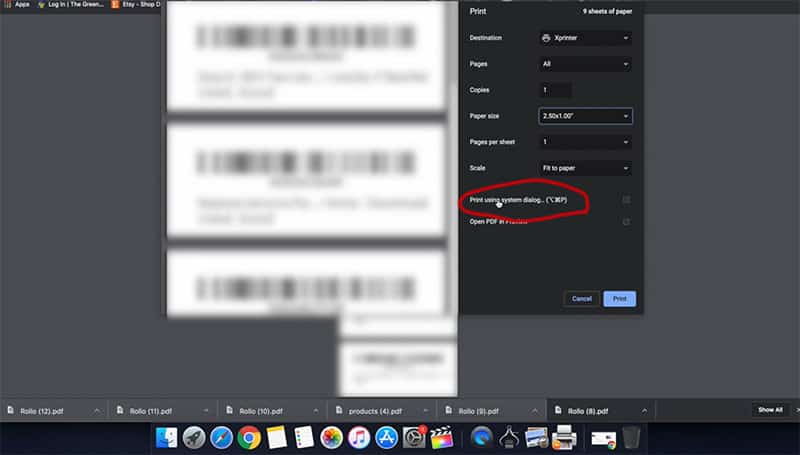
To print these labels correctly on your thermal printer, you will need to set up and adjust settings. Go ahead and click print to pull up the printer’s settings page.
Step 2
Then, select the correct printer under “Destination” and click on “Print using system dialog…” where there will be additional settings options that will pop up. Choose the printer you are using under “Printer” and click on “Last Used Settings” under “Presets” to save the current setting for next time.
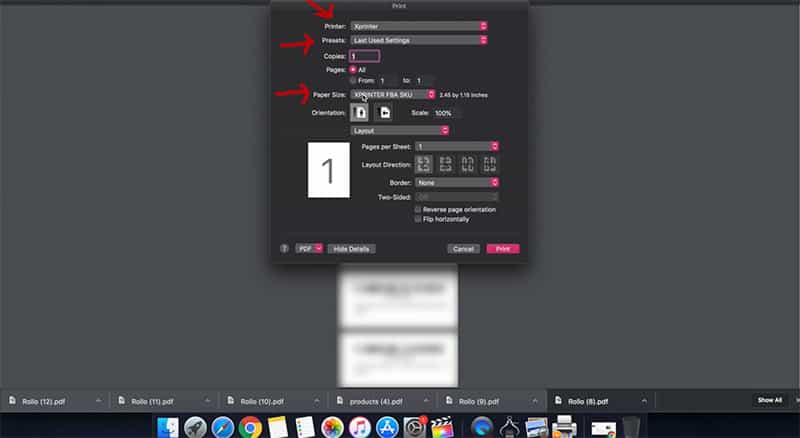
Step 3
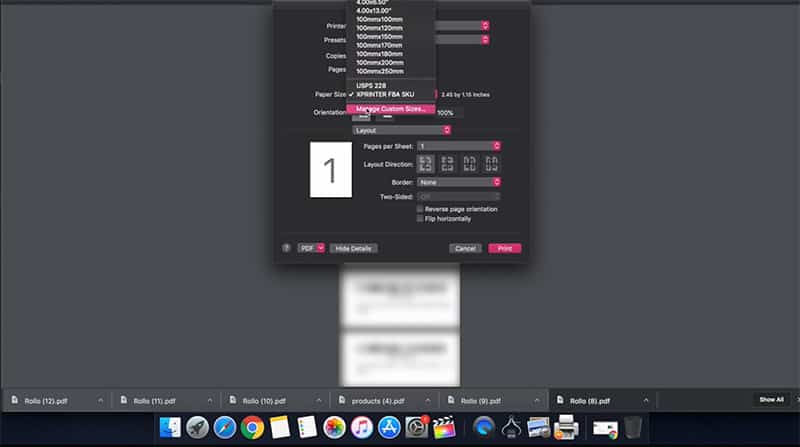
The Paper size setting is very important here. To set this up, click on “Manage Custom Sizes…” where a small bar will appear.
Step 4
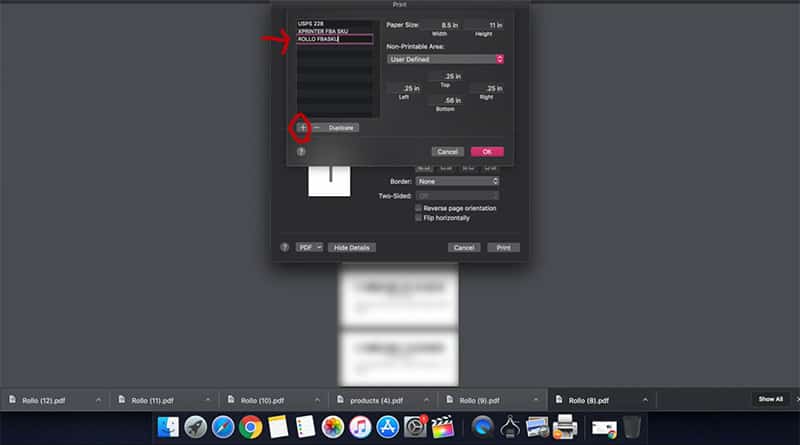
Then, click on the “+” icon on the left side and rename “Untitled” to something you will remember for next time. We named ours the printer name, followed by FBASKU. Below is just to show you how it is done. We have already set up ours as “XPRINTER FBA SKU”.
Step 5
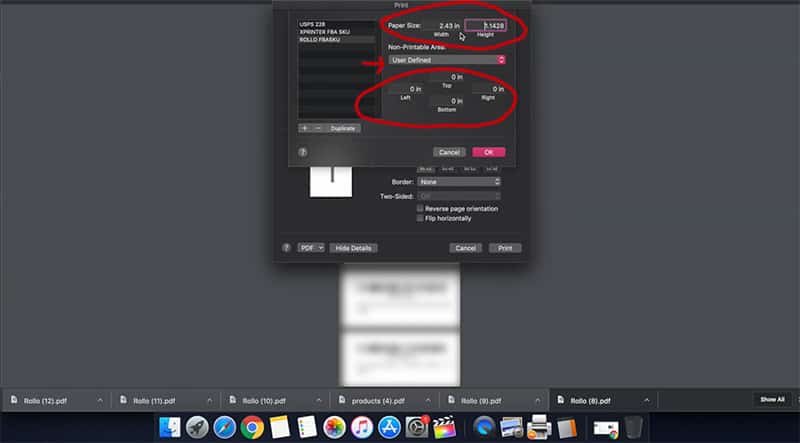
Next, you will need to adjust the paper size and define all the non-printable areas. Adjust the Non-Printable Areas to User Defined and set all numbers to zeros on the left, top, right, and bottom fields.
Make sure that you are putting the dimensions of your labels in decimal format for the “Paper Size”. For example, if the labels that you have purchased from amazon says 1-1/7” x 2-3/7”, you will need to convert it to 1.14” x 2.43”. Remember the width of the labels will be longer than the height so make sure you are entering the larger number under the width.
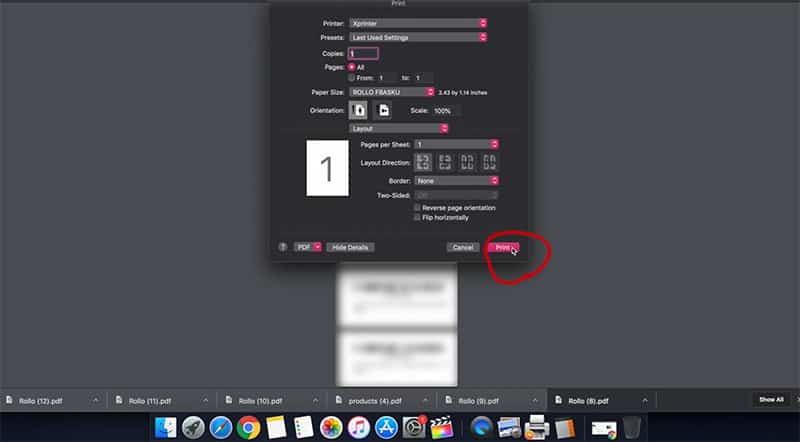
Step 6
Finally, click “OK” to save all the changes. It will take you back to the printer’s settings. Make sure that the name you have given is what is under the “Paper Size”. All other settings should be set at what we have chosen at this point. Finally, click “Print”. The SKUs should now be printed with each individual barcode on each individual label.
You are done! Make sure that you are sticking the correct Amazon FBA FNSKU labels or stickers to the correct product. You just saved yourself a lot of time.