
A new year coming means time to start fresh! Whether you’re looking to declutter your home or make extra money, Facebook marketplace is an easy and fee-free way to get cash. This post will go over step-by-step how to sell on Facebook marketplace. All you need is an active Facebook account to get started.
How To Sell On Facebook Marketplace: Step-by-Step
The first thing you will need to do is log on to your Facebook account on the Facebook app. You can use a regular desktop or your mobile phone. However, the listing and selling process will be a lot easier with your phone because you will be able to take pictures and upload them directly.
You will also be able to text back on Facebook messenger more quickly on your phone. That is why this step-by-step will be shown on a phone but the same steps apply on a computer or tablet.
Look For The Marketplace Icon
Once you log onto your account, look for the marketplace icon.
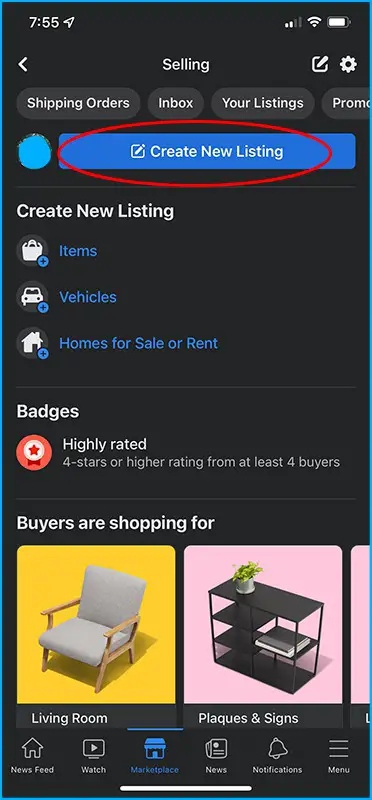
Select Create New Listing
You will see a blue bar that says “Create New Listing”. Click on it to start your listing.
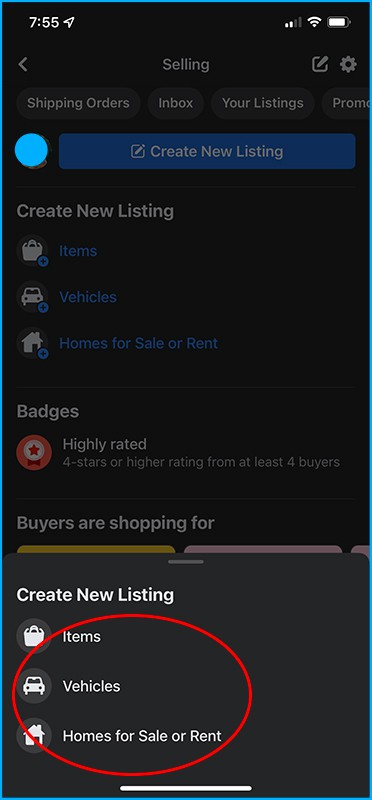
Select “Items”, “Vehicles”, or “Home for Sale or Rent”
You will be able to select between “Items”, “Vehicles”, or “Home for Sale or Rent”. Unless you’re specifically selling a vehicle, home, or to rent a home, you will select “Items”.
Add Photos
The first prompt will ask you to “Add Photos”. You will click on this to access your camera.
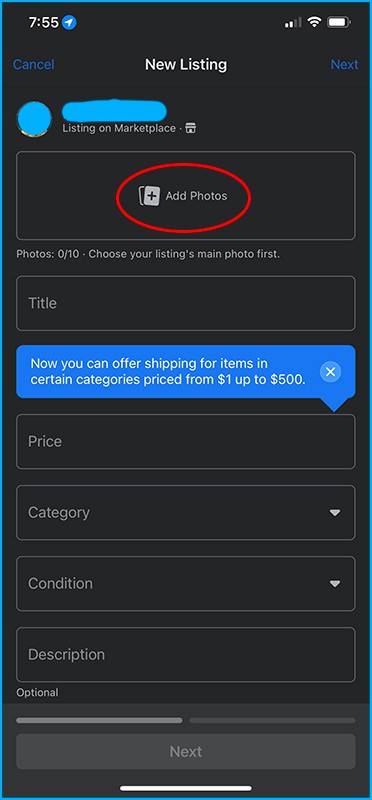
Depending on the type of phone you have, you may have to select a camera icon again so you can start taking photos with your phone. Make sure to take as many photos as you can. Facebook allows up to 10 photos for each post.

The more photos you take will allow potential buyers to see all angles of your items as well as imperfections or flaws if there are any. You will know that you selected the right photos when there is a blue rim around each photo.

Enter Title
Enter a short description of your item under the title, including the brand. Keep in mind that certain things may have multiple names.
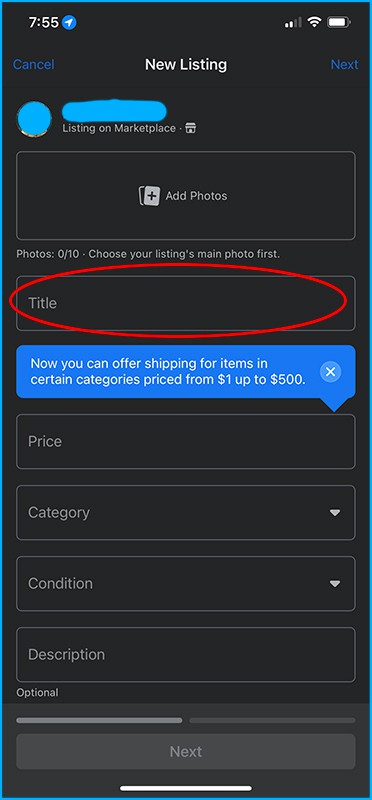
For example, “nightstands” can also be called “bedside tables”. If you have the room, enter both terms to capture the possible ways that the person looking for them will type in the search.
Enter Price
When you first list an item, you can price them either a bit higher to make room for negotiation. Or price them low to sell the item quickly. If you’re in a hurry to move, you may want to price your item cheap so that your item gets sold quickly.

Otherwise, price your item a bit higher because, in a week’s time, you can edit your price at a 10% discount until you have a buyer. You will find that there are many people who will ask for a much cheaper price than your listed price. Pricing your items a bit higher will give you room to negotiate.
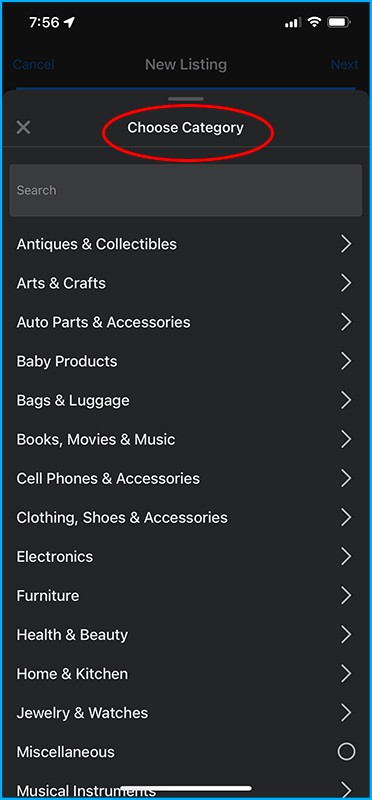
Select Category
There are many categories of items. Select the category that matches your item most closely.
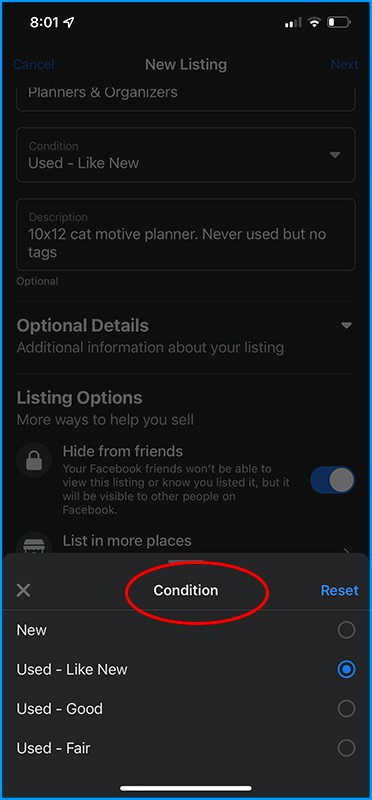
Select Condition
Select the condition that matches closely with what you have. For used items, make sure you include any imperfections in the photos and description.
Enter Description
This field is where you will be able to enter the most information. To make it easier for yourself, include details such as measurements for furniture, how often the item was used, or whether certain accessories are included.
Select Listing Options
There are additional listing options such as listing in more places or Facebook groups as well as all changing the quantity if you have multiples of the same exact items. Most people that casually sell on Facebook marketplace do not have to worry about this.
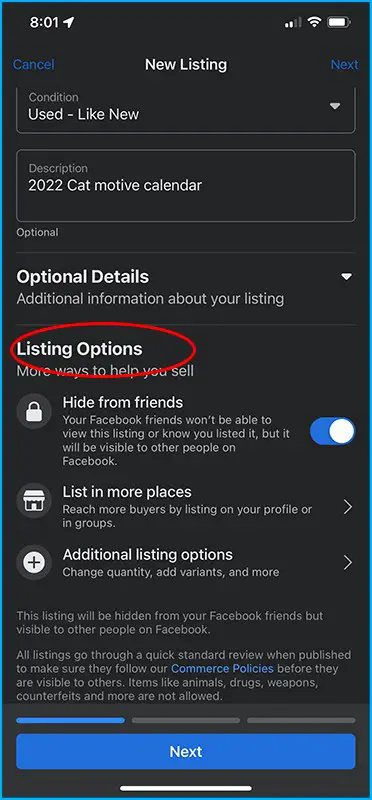
However, you may want to select “Hide from friends” so that your listings do not show up on your friends’ feed. Unless you do want your Facebook friends to see the listing.
Choose Delivery Method
Facebook marketplace now allows you to offer shipping to those outside of your city or metroplex. For large items such as furniture or appliances, shipping will not make sense. However, clothing and small items may be worth considering.
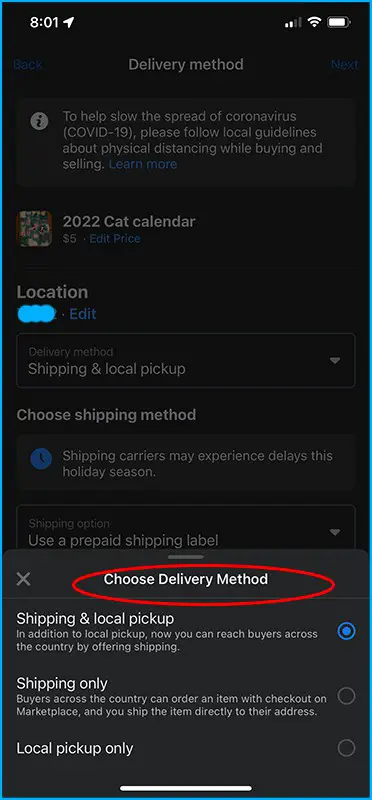
If you’re not interested in shipping, don’t worry about the shipping option and only select “Local pickup only”. If you are interested in shipping your item, we have a step-by-step walk-through below.
Read Also: Shipping With Facebook Marketplace (Step-By-Step With Pictures)
You will need a shipping scale and measuring tape to enter the shipping information correctly for postage.
Enter Meetup Preferences
You can select meetup preferences based on what may make sense for your specific situation. If you’re selling furniture, it may be most practical for a buyer to do a door pickup. However, if you’re not comfortable with giving strangers your home address and your item is easily portable, you may select a public meetup.
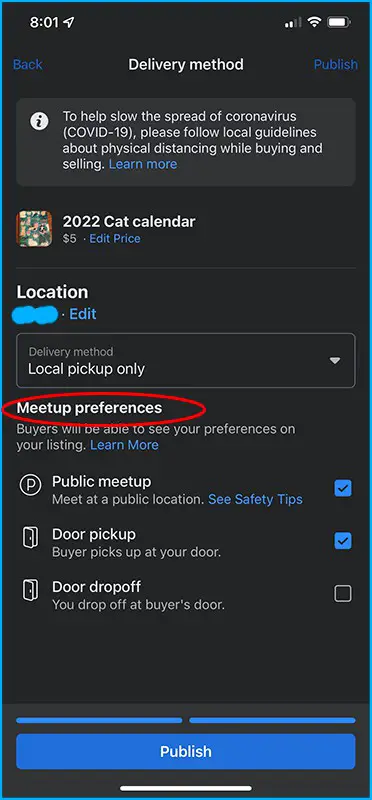
Door dropoff should be the last consideration because if you brought the item to a potential buyer but they change their mind when they see the item in person, it will be a loss of time and gas for you.
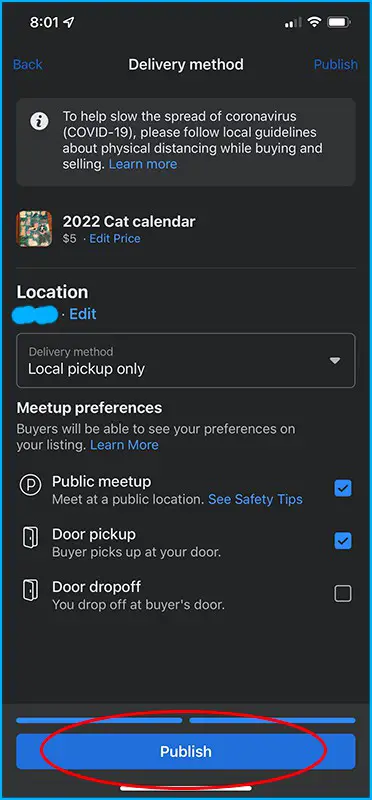
Publish
Once you’re happy with all the information entered, all you have to do is click on “Publish” and your item becomes live for others to see. Expect to get Facebook messages asking if the item is still available.
Once you know the basics of how to sell on Facebook marketplace, you will learn what works for you in terms of communication and negotiating prices. We have tips to help you in the next article below.
Read Next: Tips For Selling On Facebook Marketplace (2021)
Last Tips
Make sure to be diligent when you are communicating with a potential buyer. It is best to communicate through Facebook messenger. Make sure you don’t click on any link that anyone sends or accept any checks in advance.
Read Also: Selling On Facebook Marketplace Or OfferUp? Here Are Phishing Scams To Look Out For